
LmBox Bridge LUT library: mount LUTs from any drive, pick by preview, apply to DaVinci Resolve and Premiere in one click
Step-by-step guide
For the full screen reference and top-bar switches, see LUT library (Lab guide). This post is the illustrated companion to the public class. If you have not mounted a folder in the sidebar yet, start with Media folders: how to add and remove them. The screenshots show the Chinese interface.
Hi, I am KernelKun. In DaVinci Resolve you often have to copy LUTs into a fixed folder, and in Premiere Pro picking a LUT usually means scrolling a text list. Neither is fun. LmBox Bridge "Media → LUT library" keeps the library on any drive or NAS, uses a timeline frame as the preview, and writes the LUT back to the connected editing app with a double-click. This write-up is based on the August 2026 public class. If a step differs, the main guide wins.
Video tutorial
Public class demo: getting started with LUT library (preview, apply, clear). Open on Bilibili
What you will learn
- What LUT library is, and how it differs from DaVinci Resolve's own LUT folder
- How to grab a preview from the timeline, enlarge it, and clear it with Shift
- Premiere: clip or adjustment layer, and Input LUT vs Look
- DaVinci Resolve: source Input LUT vs node LUT
- The eraser and the compare switch
What is LmBox Bridge LUT library
LUT library is the grading preset library in the LmBox Bridge sidebar: mount .cube and similar files from local folders or extension packs, see an effect preview in the list, enlarge to compare, then apply to a Premiere or DaVinci Resolve timeline. In one line: you decide where the library lives; the top-bar switches decide where it is applied.
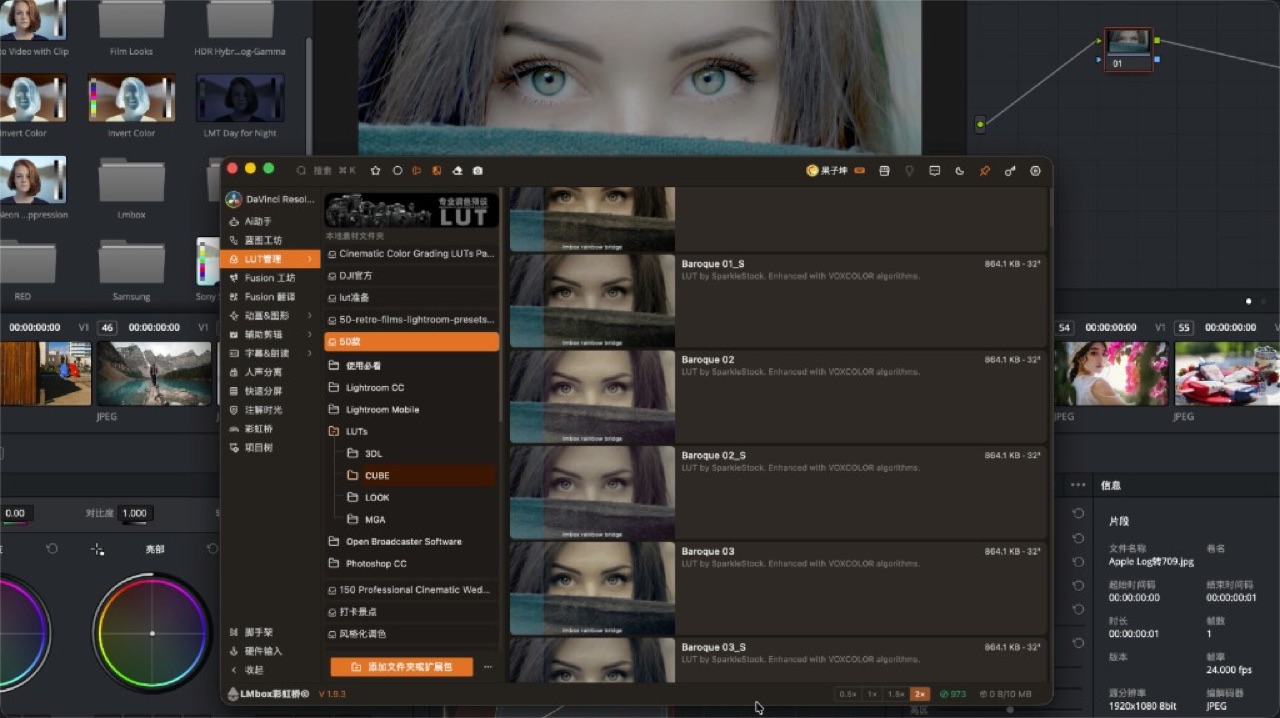
Figure: The LUT library screen — sidebar folders, list previews and the add entry. In the background it can drive DaVinci Resolve or other connected hosts.
How is it different from DaVinci Resolve's LUT folder and Premiere's list
| LmBox Bridge LUT library | DaVinci Resolve's own LUT folder | Premiere Lumetri list | |
|---|---|---|---|
| Where the library lives | Any drive / NAS / LAN path | Usually a fixed folder inside the app (the list often needs refreshing) | Browse and import, or the effects list |
| How you pick | Thumbnail preview + a timeline still | Hover preview in the Color page LUT browser | Mostly a text list, hard to scan at a glance |
| How you apply | Double-click to write to the connected extension | Color page / clip menu and more | Lumetri Input LUT or Look |
| Across apps | The same library works in PR ↔ DaVinci Resolve after you switch the host | Tied to the DaVinci Resolve project environment | Tied to Premiere |
What to prepare first
- Install and open the LmBox Bridge desktop app
- To apply on the timeline: open Premiere or DaVinci Resolve and check the editing extension is connected. In the sidebar, switch to the matching editing app
- Open LUT library in the sidebar and mount your LUT folder or extension pack first, following how to add local folders
- Premiere: select a video clip on the timeline. DaVinci Resolve: put the playhead on the target clip
Note
Browsing previews works without the extension. Double-click apply and timeline stills need the extension online. A custom preview needs the current folder to be writable.
Preview: grab a still from the timeline
Official packs ship with their own reference pictures. For a folder you mounted yourself, use the camera in the top bar: grab one frame from the timeline of the connected app and map it as the compare original for that folder.
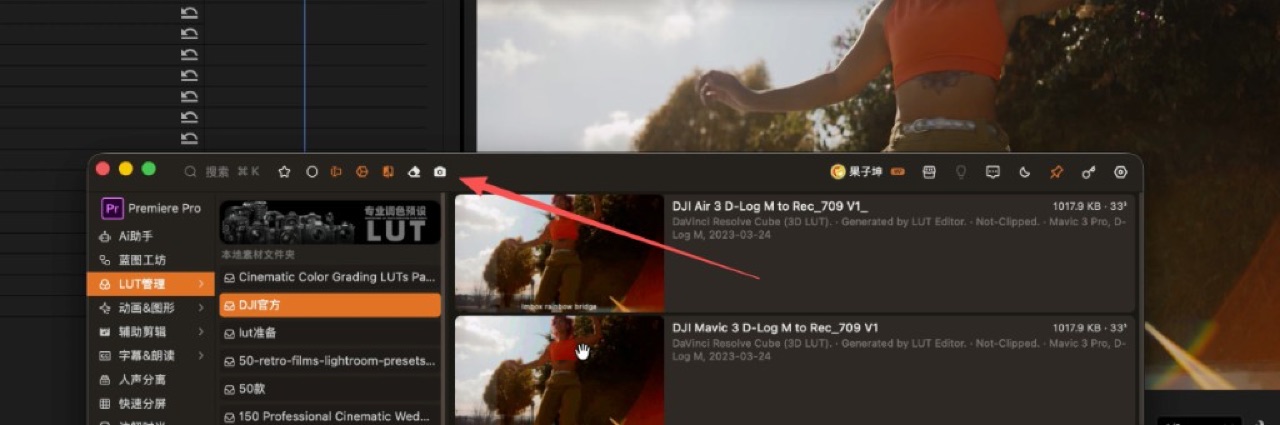
Figure: The camera icon in the top bar (at the arrow) grabs a preview from the timeline. Select the sidebar folder first, then click it.
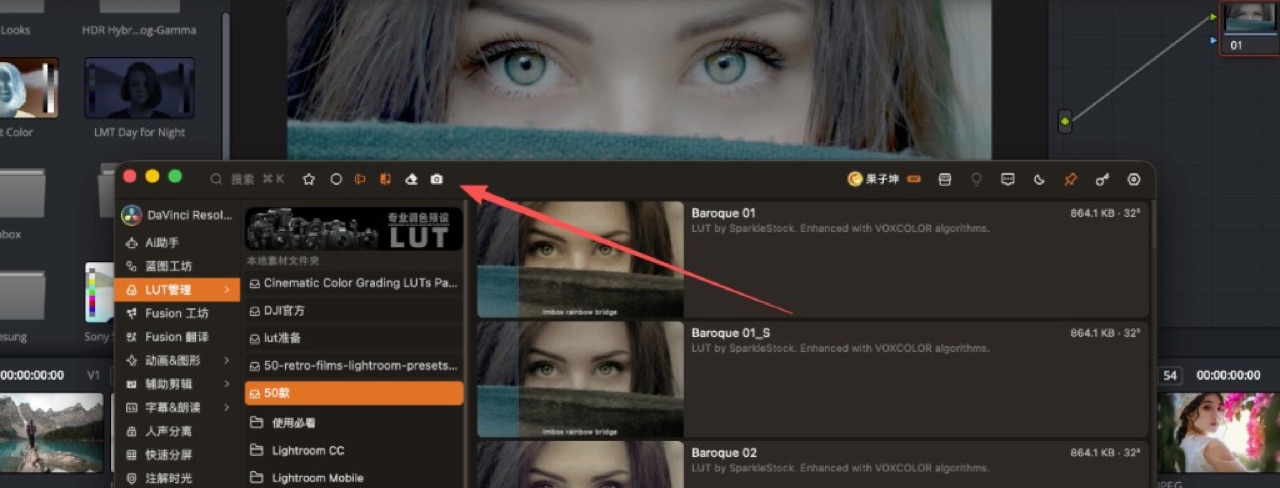
Figure: Click the camera (at the arrow) to use the current DaVinci Resolve / Premiere timeline picture as the reference preview. Switch folders and grab again — the preview follows the folder.
To clear a custom preview: hold Shift and click the camera to go back to the default picture.
If the preview is small, set it to 2×. To see detail: right-click "Preview" or double-click the thumbnail to enlarge.
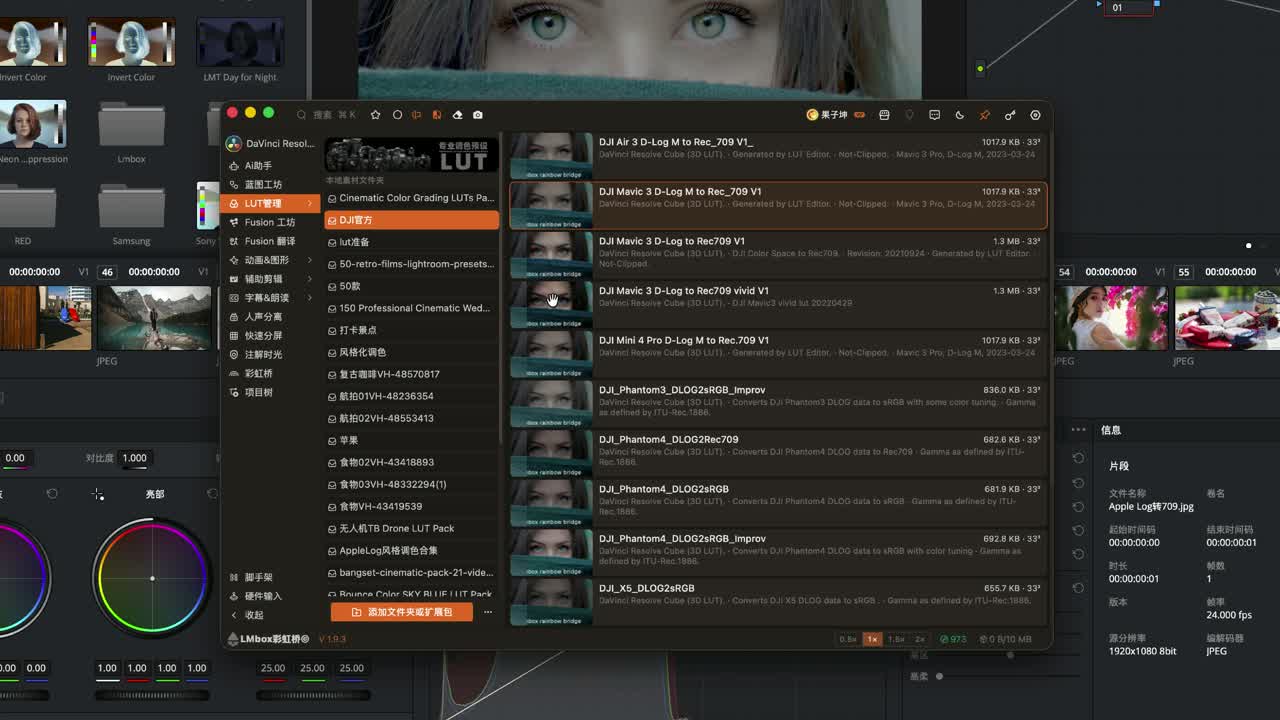
Figure: Zoom and enlarged preview, so you can see the tone clearly before picking a LUT.
Top-bar targets: Premiere and DaVinci Resolve differ
The toolbar buttons change with the connected app. In Premiere's Lumetri there are usually two routes: Input LUT and Look. In DaVinci Resolve they are source Input LUT and node LUT.
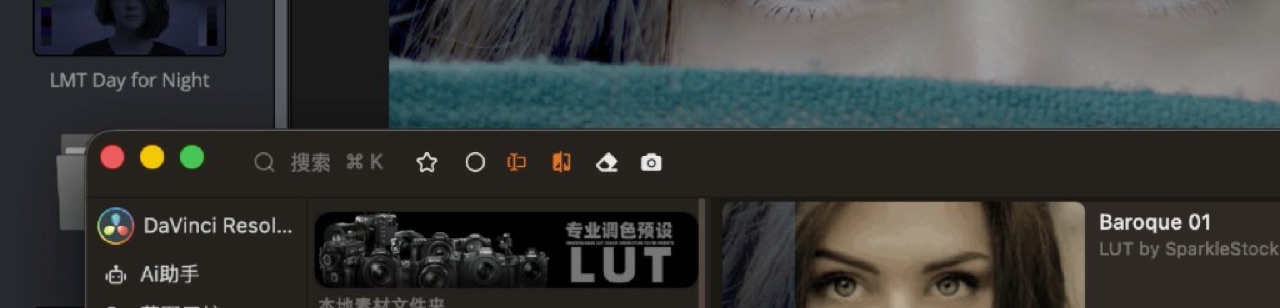
Figure: With DaVinci Resolve connected, the top bar shows the source LUT / node LUT switches (no Look split as in Premiere).
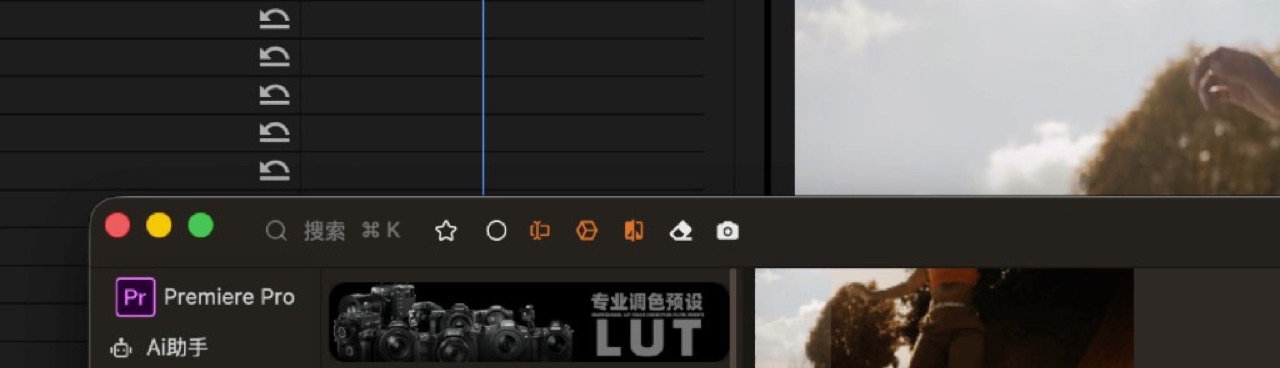
Figure: With Premiere connected, the top bar adds the clip / adjustment layer and Input LUT / Look switches.
Apply to a clip / the source
Pick a target, then double-click an item: in Premiere it is written to the selected clip; in DaVinci Resolve it is written to the current clip's source LUT.
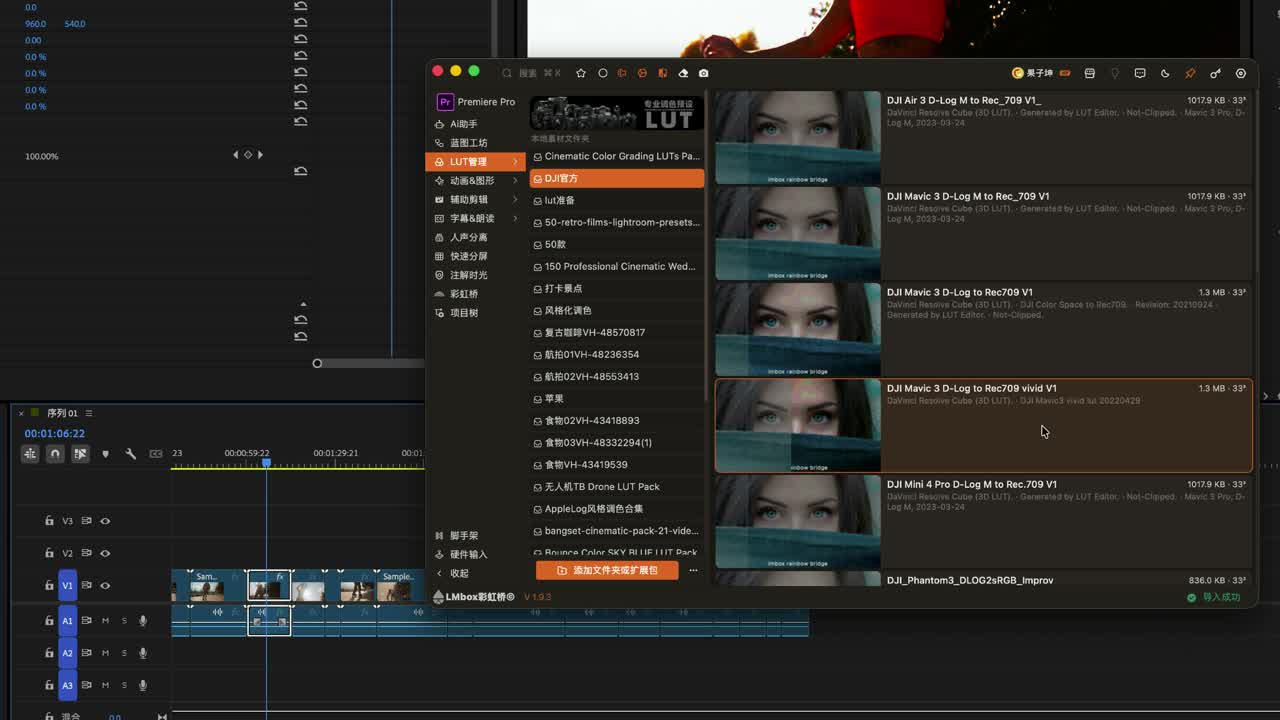
Figure: Double-click to apply to the clip (in DaVinci Resolve this is the source Input LUT).
Adjustment layer / grading node
Switch to "Adjustment layer", or to the DaVinci Resolve "Node", then double-click: Premiere creates an adjustment layer; DaVinci Resolve puts the LUT on a Color page node.
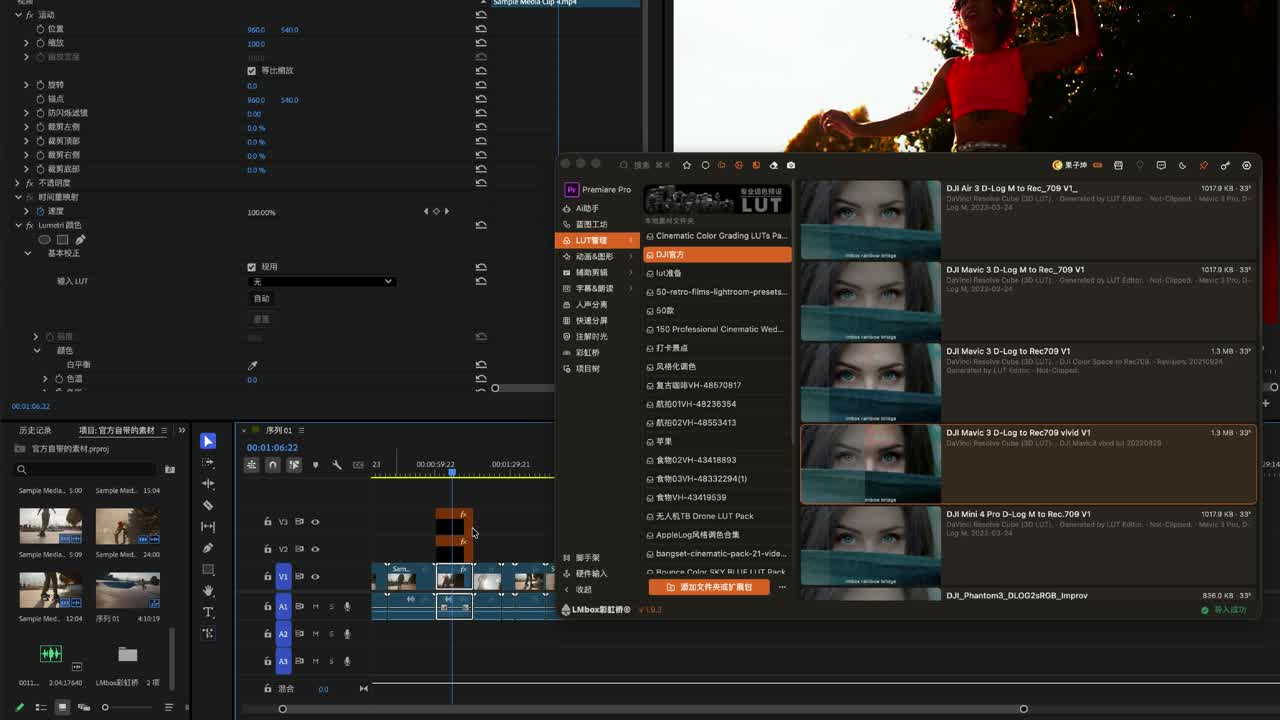
Figure: An adjustment layer appears above the Premiere timeline (this frame is after apply). In DaVinci Resolve the LUT lands on a Color page node.
Premiere: Input LUT and Look
| Switch | Roughly maps to | Best for |
|---|---|---|
| Apply Input LUT | Lumetri · Basic Correction · Input LUT | Technical input conversion, a common starting point |
| Apply Look | Lumetri · Creative · Look | A stylized look |
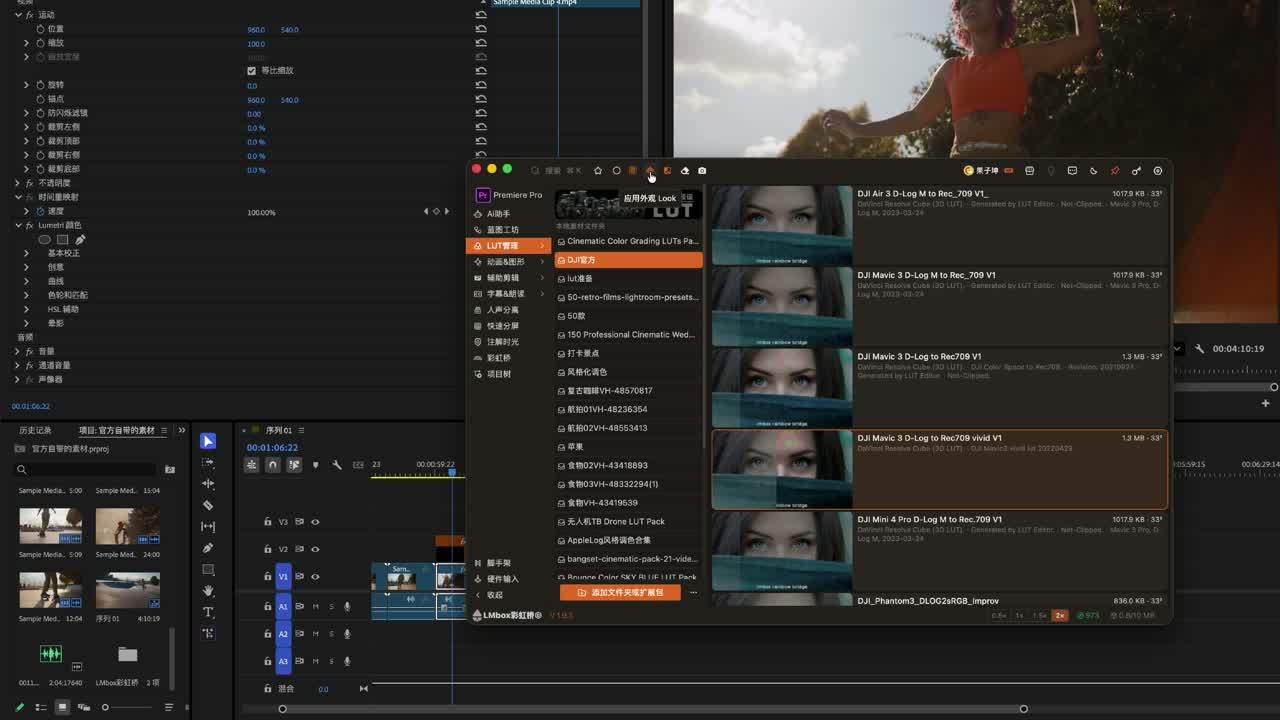
Figure: A Premiere-only split — the same file can go to Input LUT or to Look, landing in different places.
Eraser and the compare switch
When you do not want a particular apply, use the eraser in the top bar to clear the current target, or delete the effect by hand in the host. When the compare switch is on, the list shows the original and the applied result side by side; turn it off to see only the final look with less distraction.
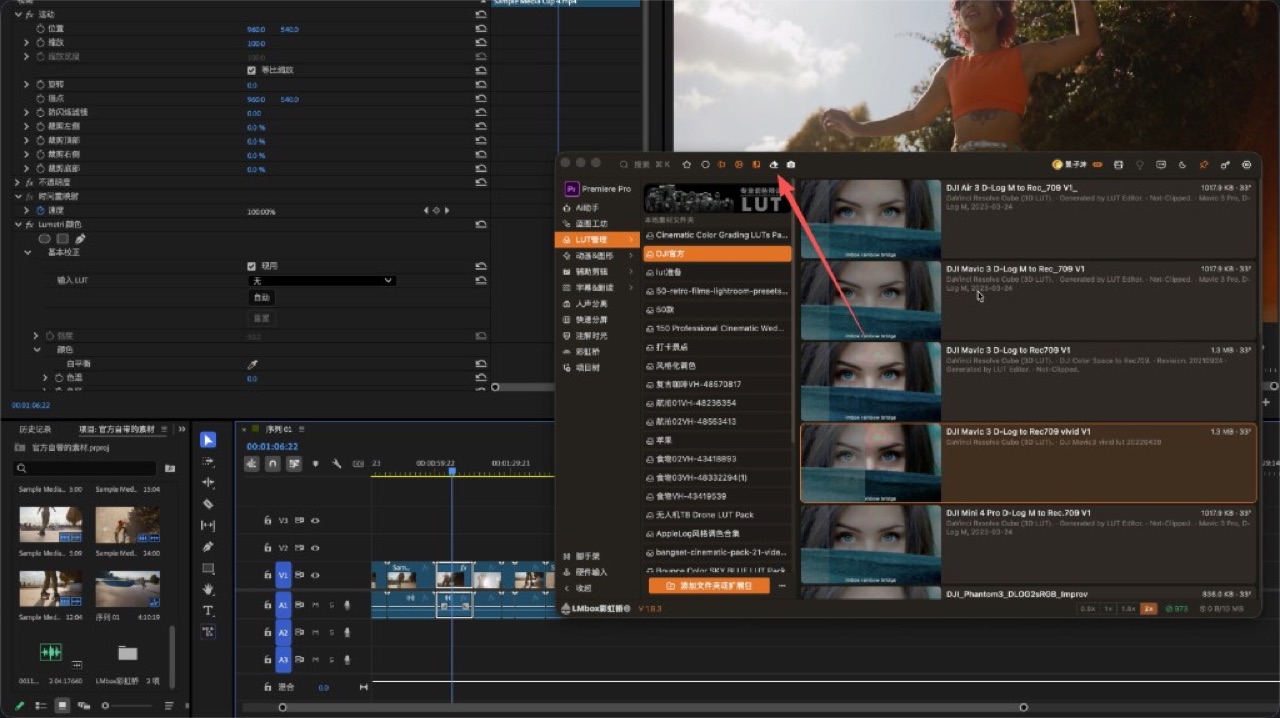
Figure: The eraser in the top bar (at the arrow) clears the current apply target in one click. You can also delete the effect in the host's effects panel.
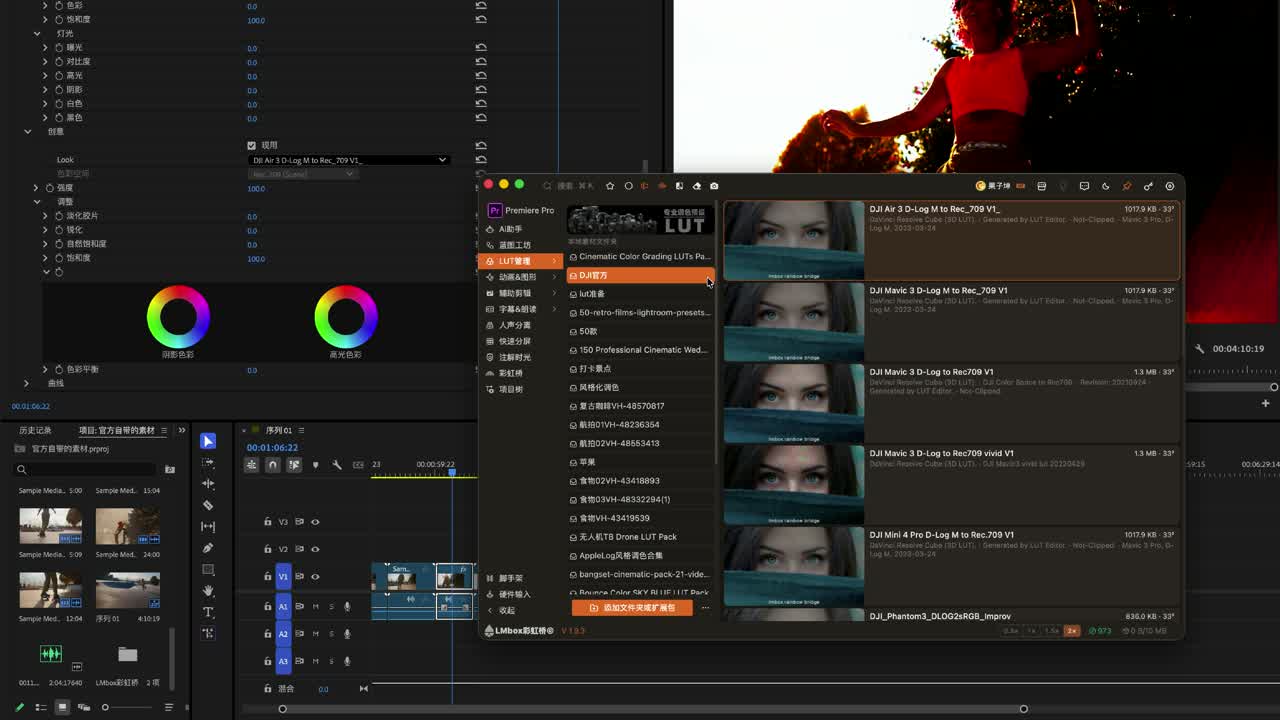
Figure: Compare can be turned off so the list shows only the final picture.
FAQ
Q: What is LmBox Bridge LUT library?
A: A grading preset library in the sidebar. Mount LUTs from any path, preview them, and double-click to apply to the connected Premiere or DaVinci Resolve.
Q: How do I import a LUT in DaVinci Resolve? Must it go in the system drive?
A: No. Mount the folder in LUT library to preview and apply. DaVinci Resolve's own "Open LUT folder" still works, but a cross-drive or NAS library fits the LmBox Bridge sidebar better.
Q: What is the difference between Input LUT and Look in Premiere?
A: Input LUT goes to Basic Correction. Look goes to Creative. The top-bar switch decides which one a double-click writes to.
Q: What is the difference between a source LUT and a node LUT in DaVinci Resolve?
A: The first sits on the clip's input. The second sits on a Color page node. Switch in the top bar, then double-click.
Q: How do I grab and clear a preview?
A: Select a writable folder → click the camera to grab the timeline. Shift + camera clears the custom picture.
Q: Which apps does the still preview support? Can it replace a full grade?
A: The public class shows Premiere and DaVinci Resolve. LUT library speeds up picking and applying. It does not replace the full node and curve workflow inside the host.
Further reading
- LUT library (Lab guide) — the main document
- Media folders: how to add them — the first step before mounting
- Lab features overview · LUT
- Sound library — a sibling media page
- Install the desktop app
- Public class on Bilibili