
Split-screen tutorial for DaVinci Resolve and Premiere: LmBox Bridge Split view maps a 3×3 grid in one click
Step-by-step guide
For the full screen reference, steps and FAQ, see Split view (Lab guide). This post is the illustrated companion to the public class. The screenshots show the Chinese interface.
Hi, I am KernelKun. LmBox Bridge "Split view" lets you build a multi-pane split screen the same way in DaVinci Resolve and Premiere Pro: get clips → design panes → apply to your edit in one click. It suits 3×3 grids, 2×2 comparisons and interview layouts. It is not multicam "director switching": it crops the picture of parallel tracks into their own panes.
Video tutorial
What you will see
- What Split view is, and how it differs from multicam editing
- How to make a split screen in DaVinci Resolve (including a 3×3 grid and presets)
- How to make a split screen in Premiere (a 2×2 test)
- What to do when the aspect ratio is wrong
What is LmBox Bridge Split view
Split view is the Lab tool for split-screen layouts: design horizontal and vertical panes in the preview, bind the clips on parallel tracks to each pane, then write the crop and transform into your editing app so several pictures sit on one canvas. From the "blink three times" 3×3 grid to the 2×2 in Premiere, the core idea is mapping, not nudging lines by hand.
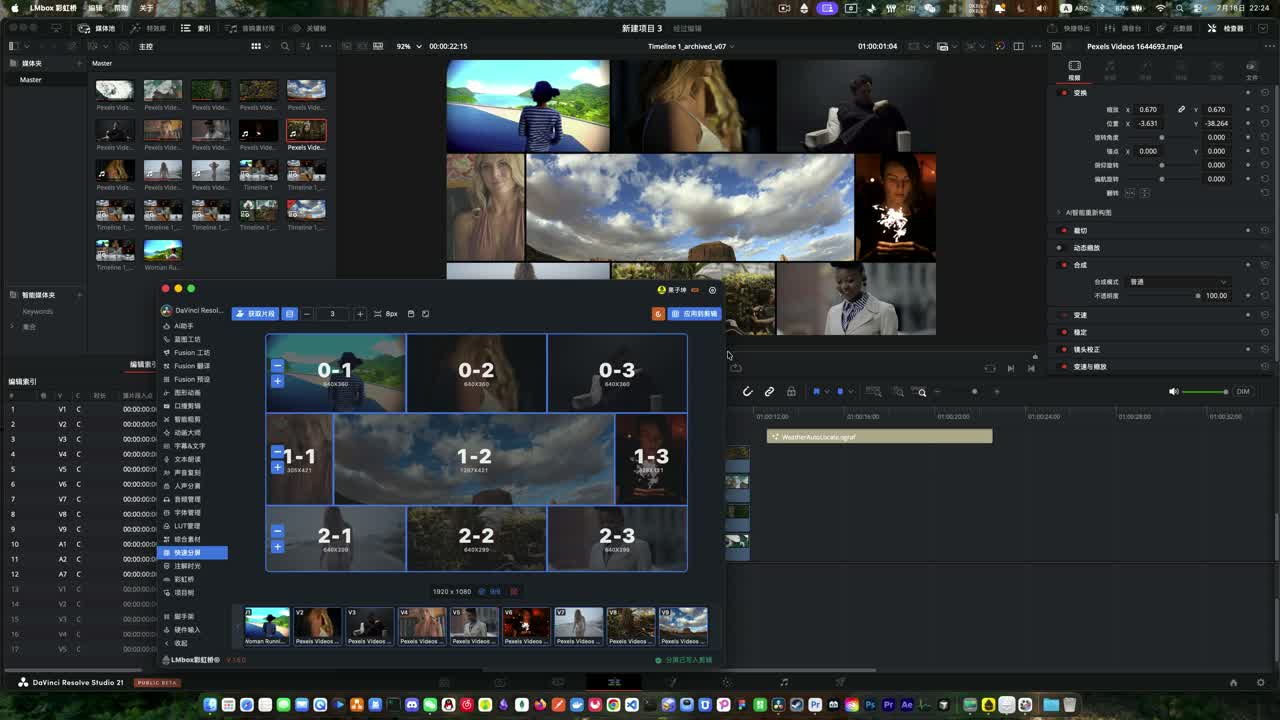
Figure: Split view works with DaVinci Resolve and Premiere Pro, with the same steps.
How is Split view different from multicam editing
| LmBox Bridge Split view | Typical multicam editing | |
|---|---|---|
| Result | Several pictures shown at once in panes | Usually one angle shown at a time |
| Timeline shape | Clips must be stacked on parallel tracks | Sync first, then switch angles |
| Typical use | 3×3 grids, 2×2 grids, side-by-side comparison | Interview directing, concerts |
| Learning curve | Drag panes + one click to apply | Sync points, multicam view, switching shortcuts |
You can combine them: align the footage with multicam first, then lay it out with Split view.
How to make a split screen in DaVinci Resolve (three steps)
In short: move the playhead onto the clips → click "Get clips" → design the panes and bind pictures → click "Apply to edit". For a live split screen the footage must be stacked on parallel tracks, not placed one after another on a single track.
Step 1: Get clips
Move the playhead to the right spot and click "Get clips" in the top bar. The clips on the current tracks go into the bottom strip and fill the panes automatically (you can rebind them later).
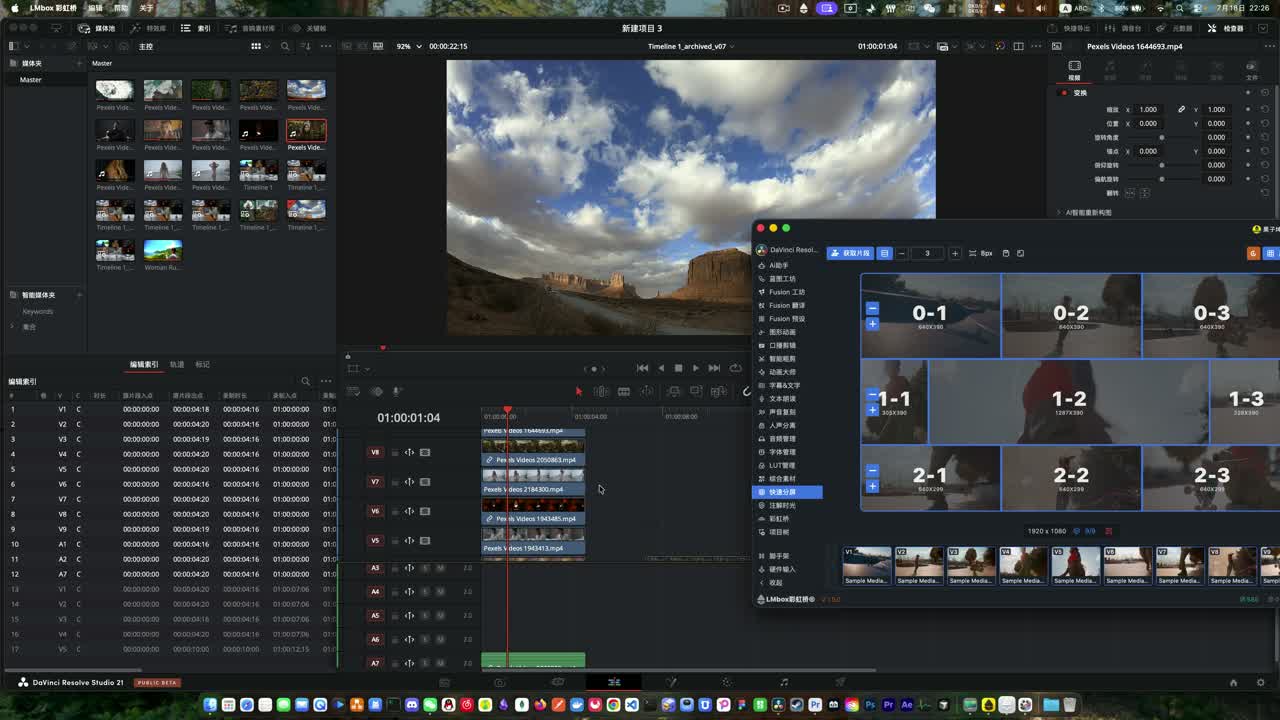
Step 2: Design the panes and fill them
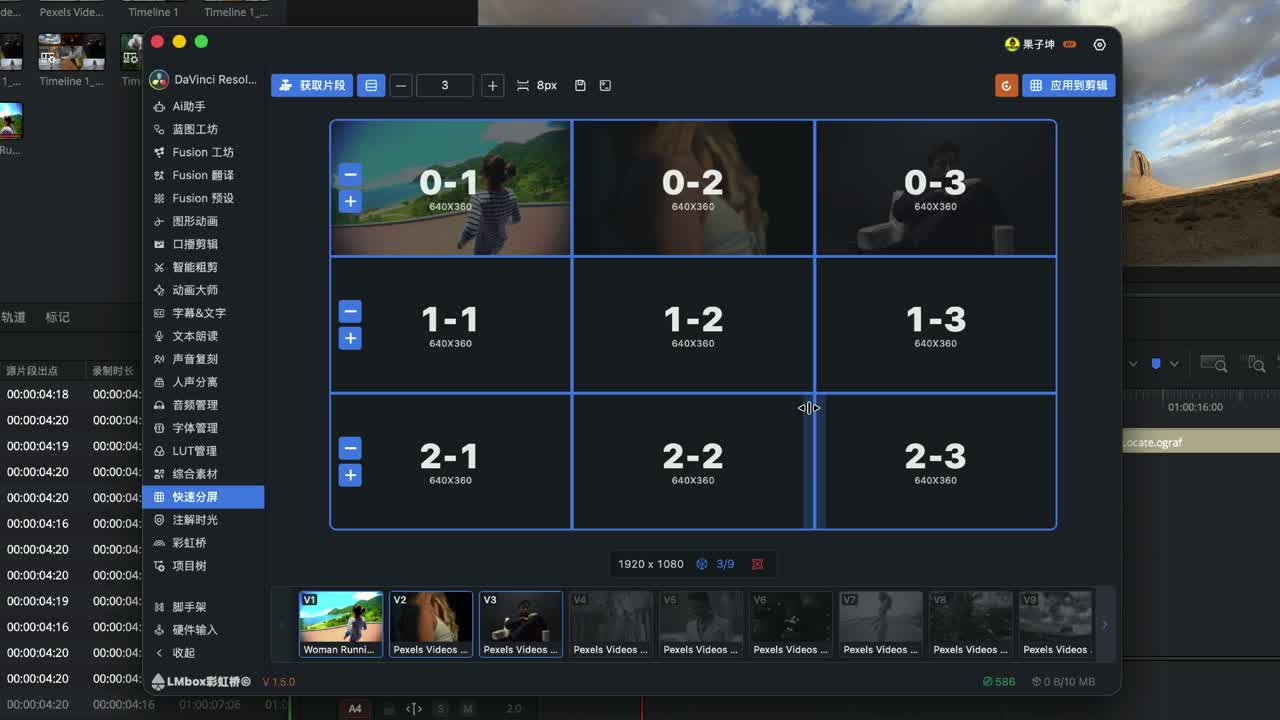
- Add or remove main areas, in rows or columns
- Drag a divider to change the ratio; double-click a divider to delete it
- Three ways to fill: auto-fill from Get, drag from the bottom strip into a pane, or random assign (shuffle as many times as you like)
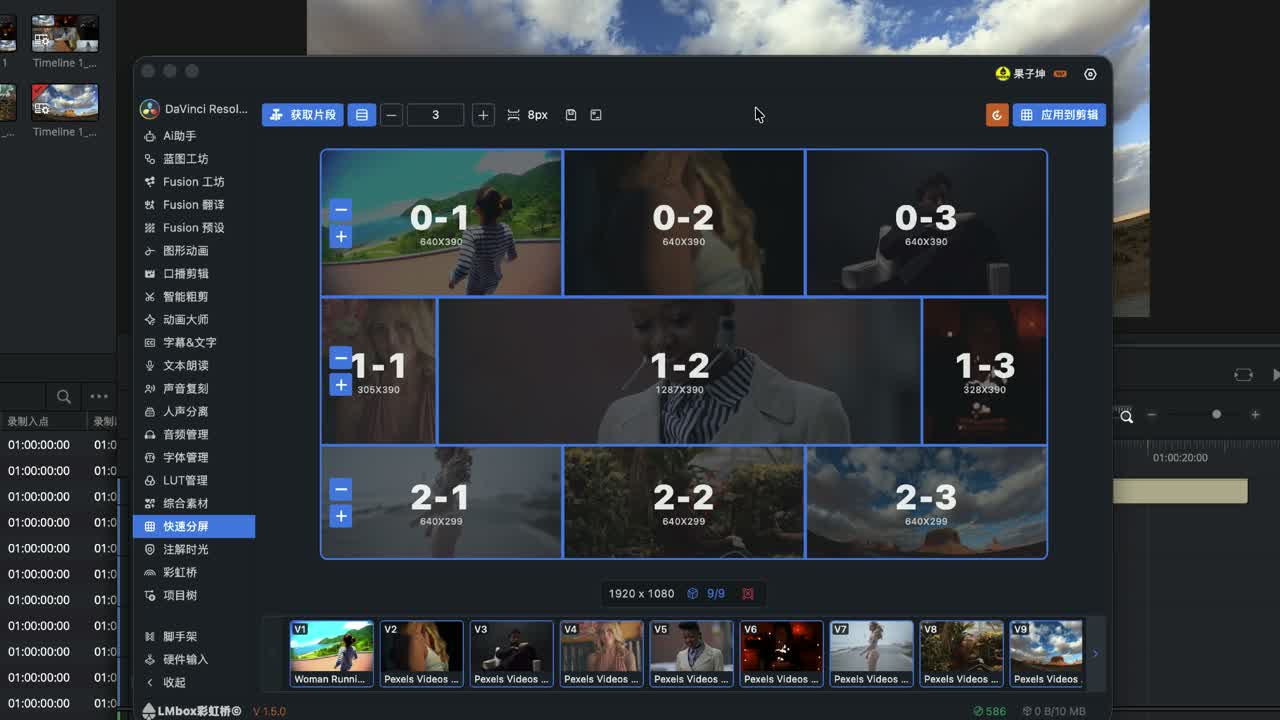
Step 3: Apply to edit
When you are happy, click "Apply to edit". Each pane maps to its timeline clip. If you only moved a divider afterwards, apply again to refresh.
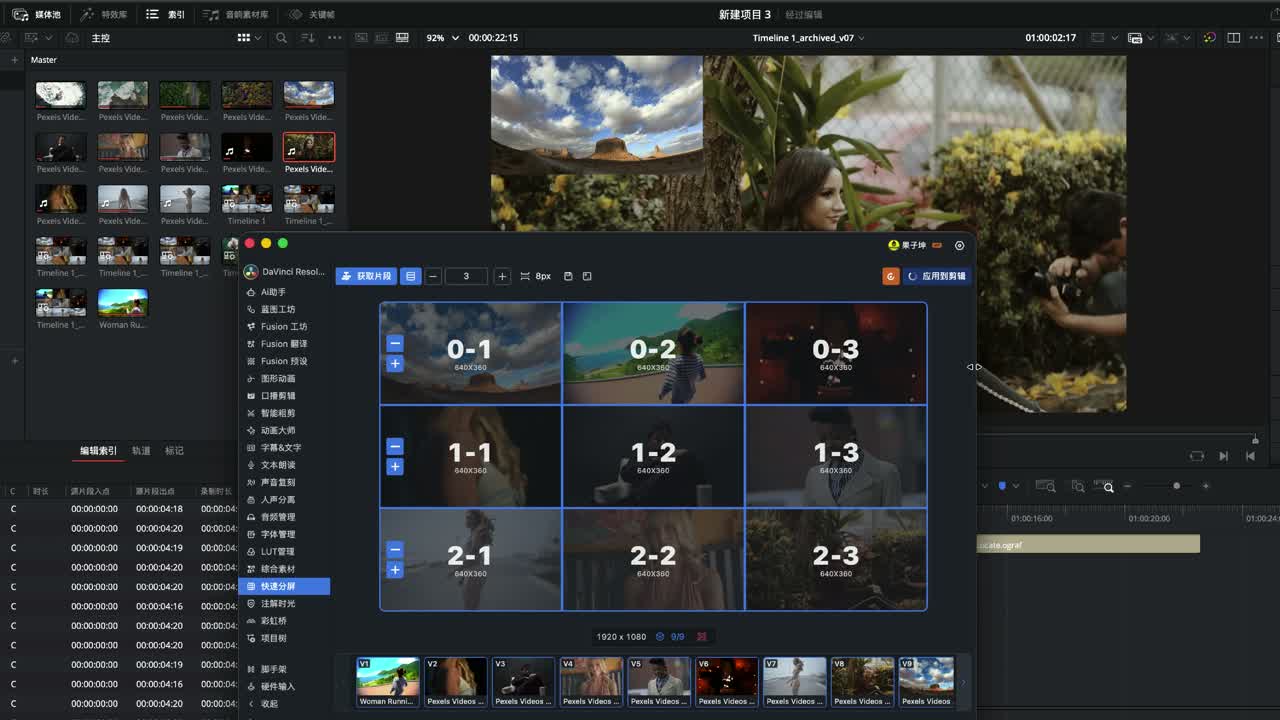
Reset clears the crops and bindings on the timeline but keeps the current layout, so you can start over with new footage.
How to use split-screen presets
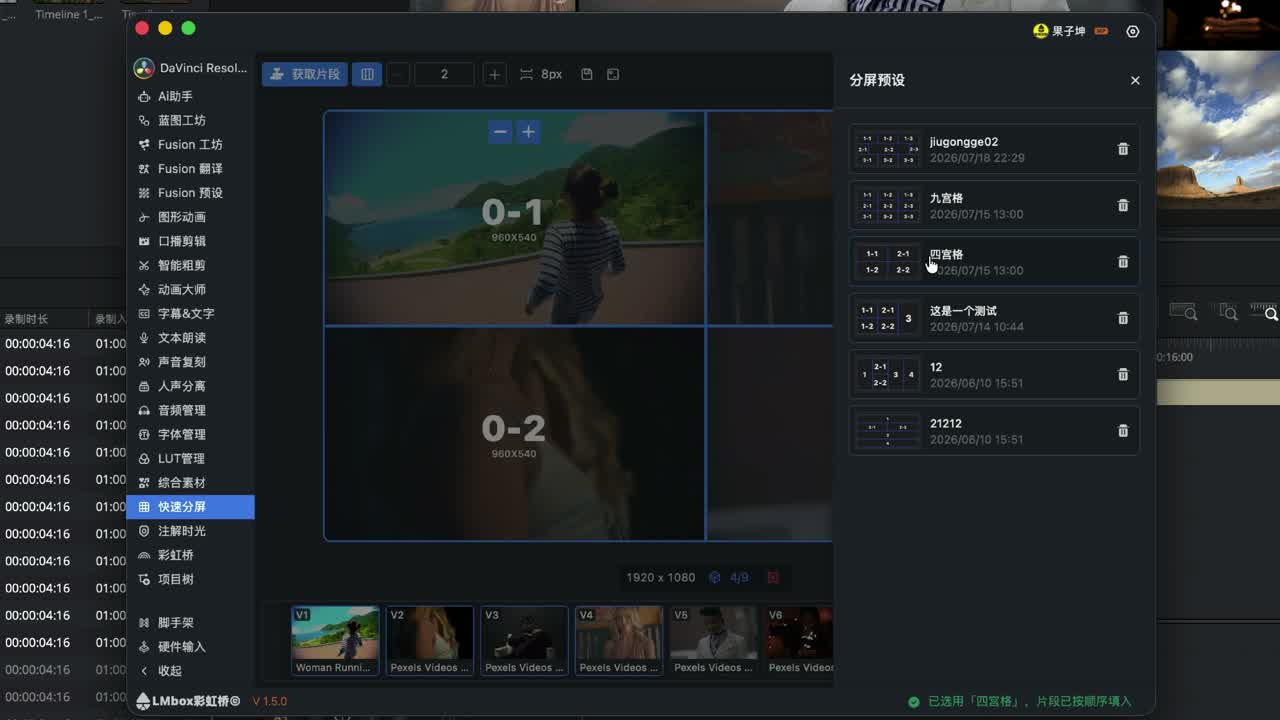
When the panes look right, click "Save as preset" and give it a name (for example 3×3 or 2×2). Click a preset in the library to load the layout, then get new clips to fill it. Presets work in both Premiere and DaVinci Resolve.
How to make a split screen in Premiere
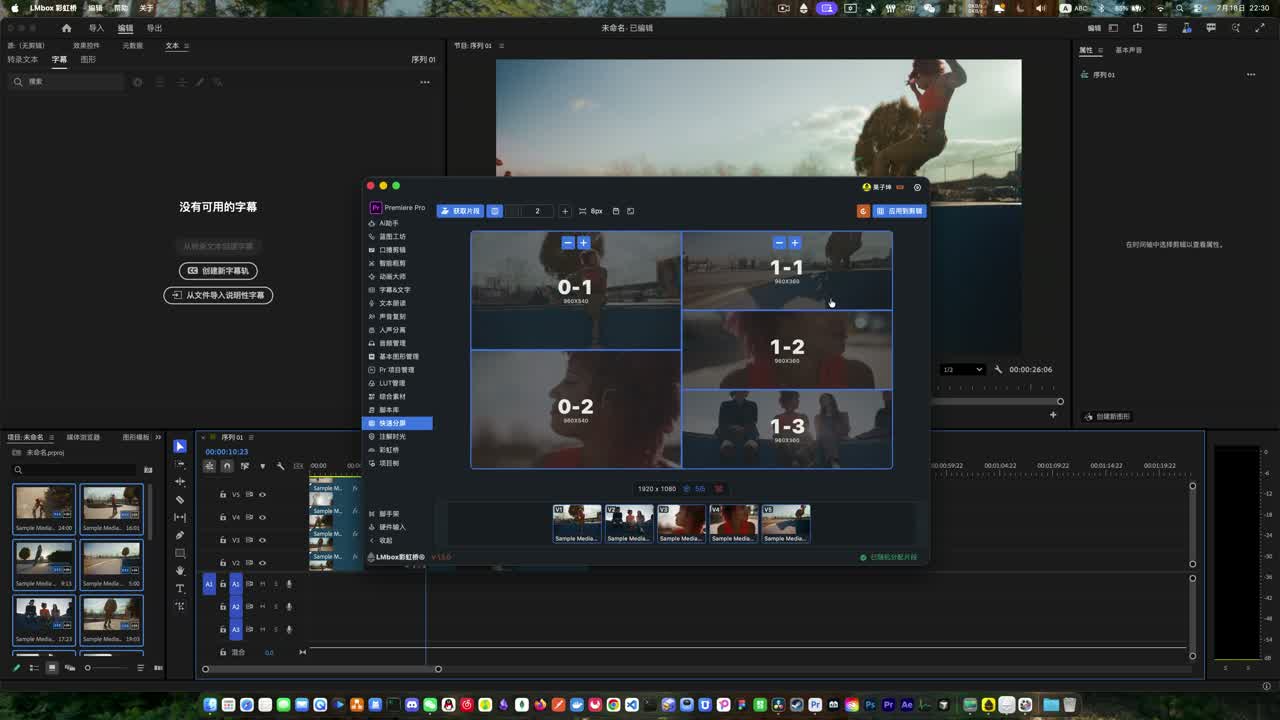
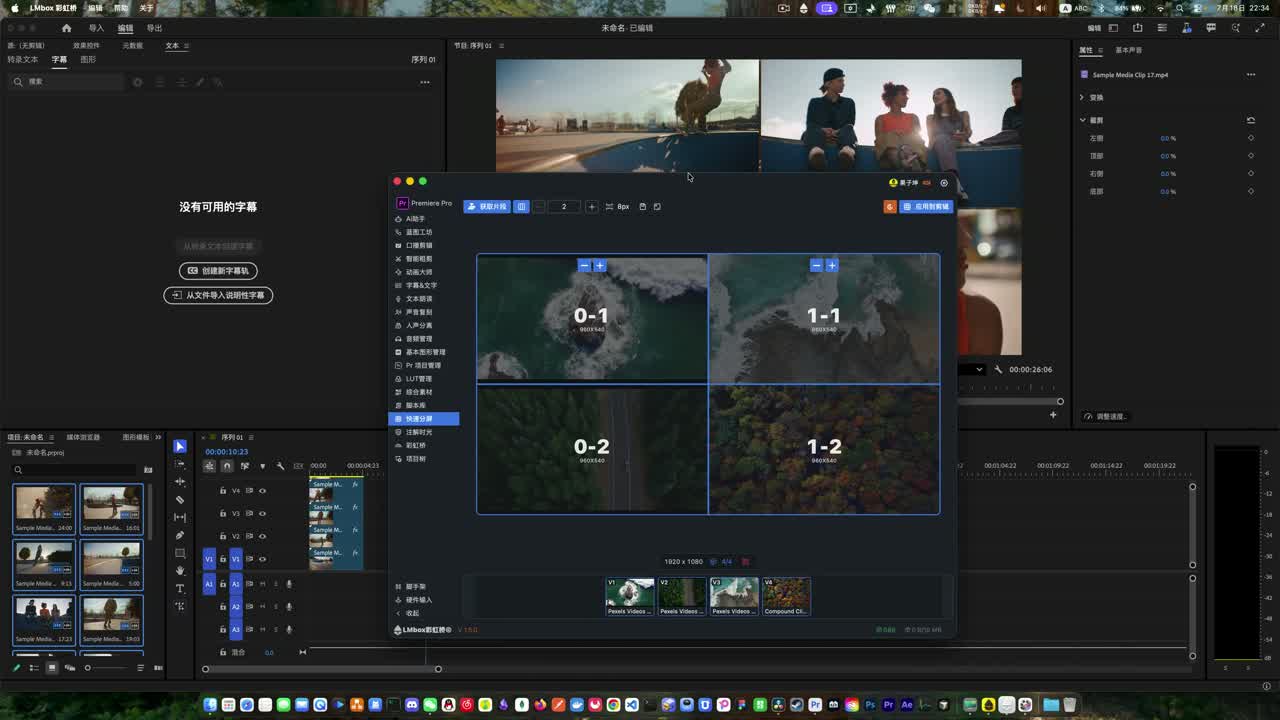
Switch to Split view in Premiere and the flow is the same. In the demo: load the 2×2 preset → select four clips → Get → Apply. If you have fewer clips than panes, add or remove panes, unbind, or drag clips in by hand.
The split ratio looks wrong in DaVinci Resolve
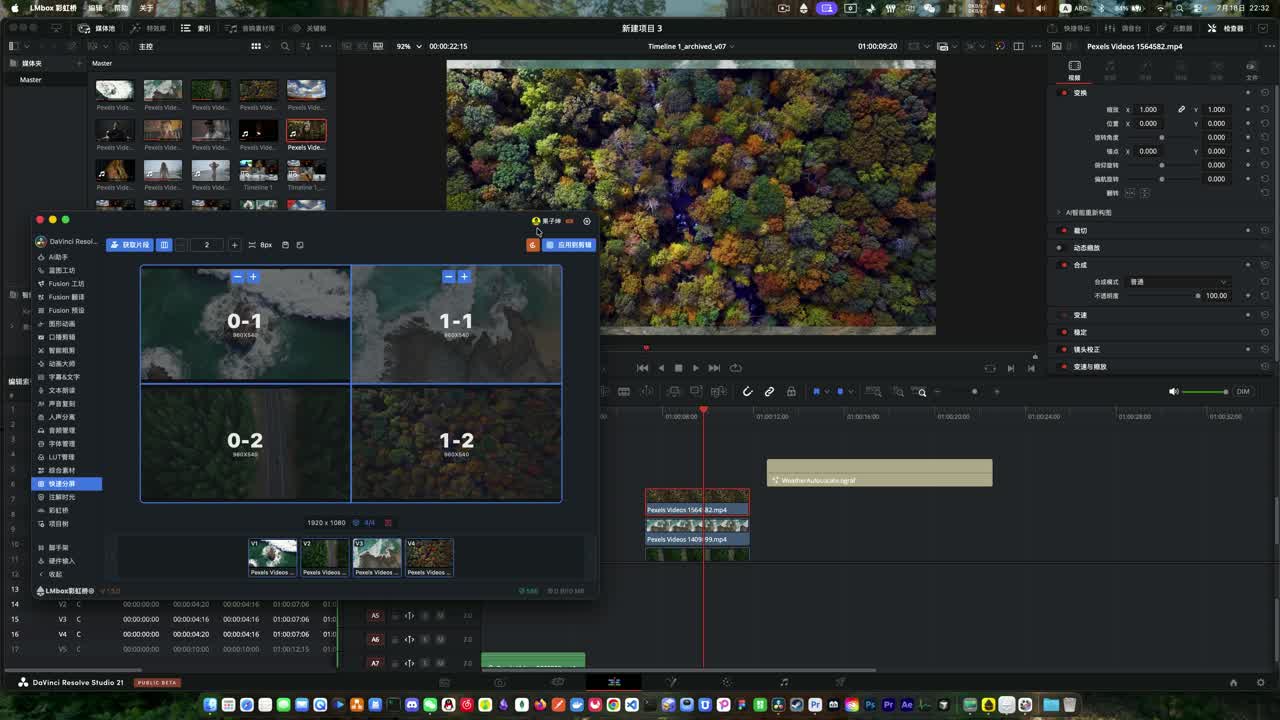
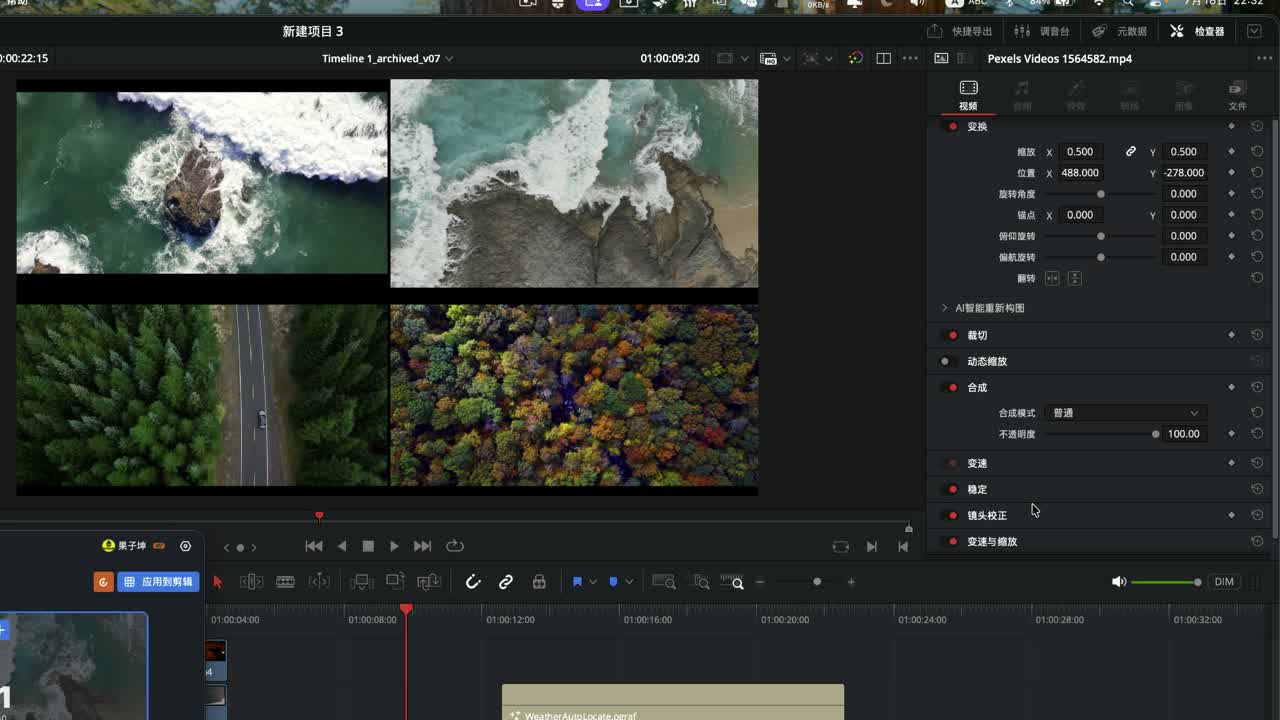
When the footage ratio differs from the timeline, or does not fill the timeline, the crop can drift and the dividers do not line up. This comes from the host calculating the crop from the footage ratio, not from a UI error.
The wrong example and the fix from the video:
- First scale the problem clip to fill the frame
- Create a compound clip (DaVinci Resolve) or scale up and then nest (Premiere)
- Get the clips again and apply
Limits
- Only horizontal and vertical splits are supported, no diagonal cuts.
- The split is static for now, with no animated transitions.
- For odd sizes or After Effects, you can send a ticket from the Split view page. That is not a promise they are live.
FAQ
Q: What is LmBox Bridge Split view?
A: A split-screen layout tool for DaVinci Resolve and Premiere Pro. It maps parallel clips into custom panes through crop and transform.
Q: How do I make a split screen in DaVinci Resolve?
A: Stack the footage on parallel tracks → Get clips → design and bind the panes → Apply to edit. See the three steps above.
Q: How do I make a split screen in Premiere?
A: The same as DaVinci Resolve. In Premiere, select the clips before you click Get.
Q: How is Split view different from multicam editing?
A: Split view shows several pictures in panes at once. Multicam editing syncs the angles and switches between them at any moment.
Q: The ratio is wrong in DaVinci Resolve. What now?
A: Scale the clip to fill first, then create a compound clip (DaVinci Resolve) or nest (Premiere), then get and apply again.
Q: How do I use split-screen presets?
A: After designing a layout, click "Save as preset". Next time, load it from the preset library and get new clips.
Further reading
- Split view guide (the main document, read it first)
- Shot scout guide · Blog: Shot scout
- LmBox Bridge Core
- Install the desktop app
If you have questions, send a ticket from the Split view page in LmBox Bridge.