
LmBox Bridge Sound library: hear waveforms at a glance, light editing, straight into DaVinci Resolve and Premiere
Step-by-step guide
For the full screen reference, shortcuts and settings, see Sound library (Lab guide). This post is the illustrated companion to the public class. If you have not added a library folder yet, start with the blog post Media folders: how to add and remove them. To install the transcoding tools, see Set up external tools. The screenshots show the Chinese interface.
Hi, I am KernelKun. Many people use LmBox Bridge "Sound library" only to manage folders and browse files. It is also a light editing tool: waveforms appear in the list, you hear a sound on hover, and you can pick a range, change speed and reverse it, then import straight into DaVinci Resolve or Premiere Pro. This write-up is based on the August 2026 public class and the desktop app around 1.9. If a step differs, the main guide wins.
Video tutorial
Public class demo: the full Sound library walkthrough. Open on Bilibili
What you will learn
- What Sound library is, and how it differs from DaVinci Resolve's built-in sound library
- Four ways to get a sound onto the timeline (double-click / drag / range / shortcut)
- How to transcode uncommon formats, and how to read the clipping hint
- How to search sounds by description, and use stars and color labels
What is LmBox Bridge Sound library
Sound library is the local sound effects library in the LmBox Bridge sidebar: add a folder and the list shows waveforms, hover to listen, double-click the waveform to edit a range, then import into the connected editing app or drag to any drop point. Three pillars to remember: fast preview, wide format support, light editing before it hits the timeline.
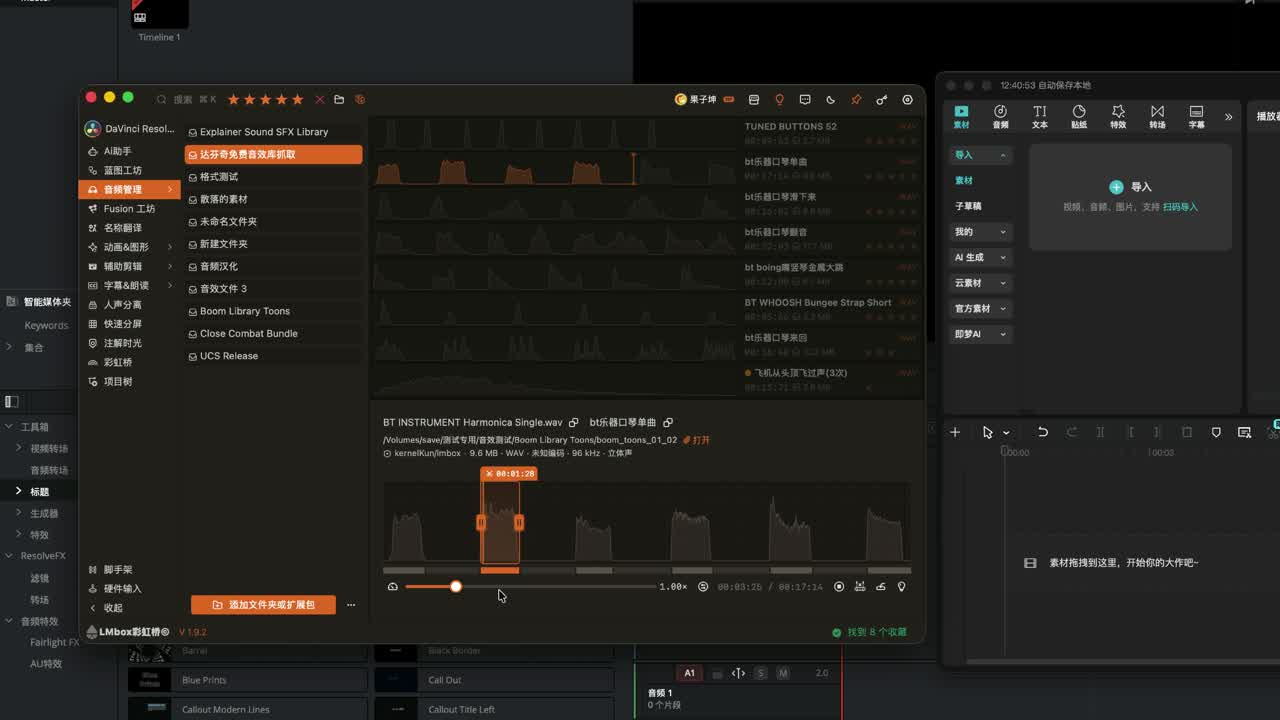
Figure: Double-click a waveform for light editing (speed, reverse and more). It is more than a file-name browser.
How is Sound library different from DaVinci Resolve's sound library
| LmBox Bridge Sound library | DaVinci Resolve "Sound Library" | |
|---|---|---|
| Main use | A cross-app sound library for DaVinci Resolve, Premiere and more | The built-in library in DaVinci Resolve's Edit / Fairlight |
| Preview | Waveforms in the list, hear on hover | Preview and search inside the library |
| Before the timeline | Range, speed and reverse, then import | Mostly pick a range in the library or trim after it is in the project |
| Translated names / search by description | Automatic translated names; build the index, then search by description | Relies on file names and metadata descriptions |
| Uncommon formats | Transcode to preview / "Transcode and import" | Limited to formats the editing app can read |
Premiere also has timeline waveforms and its own import habits. What sets LmBox Bridge apart: one library works across DaVinci Resolve and Premiere, with light editing in the library before the sound lands on the timeline.
What to prepare first
- Install and open the LmBox Bridge desktop app
- For "double-click to import to the track": open DaVinci Resolve or Premiere and check the extension is connected. When you switch the editing app in the sidebar, the import target switches with it
- For waveforms and transcoding of uncommon formats: install the external transcoding tools in Settings (see Set up external tools)
- Open "Sound library" in the sidebar and add a local sound folder or an extension pack. For adding, removing and guided steps, see Media folders: how to add them
Note
To only listen locally or drag into another app, you do not need the extension. "Import to the current editing app's timeline" needs the extension online. If the transcoding tools are missing, some formats show a red mark saying they need transcoding.
Three pillars: preview, formats, light editing
1. Fast audio preview
After you add a library, the list builds waveforms automatically and scrolls smoothly. Hover to play. The text area and the waveform area behave differently (see the next section). Files of ten or twenty MB still get waveforms fairly fast (it depends on your computer and the concurrency in Settings).
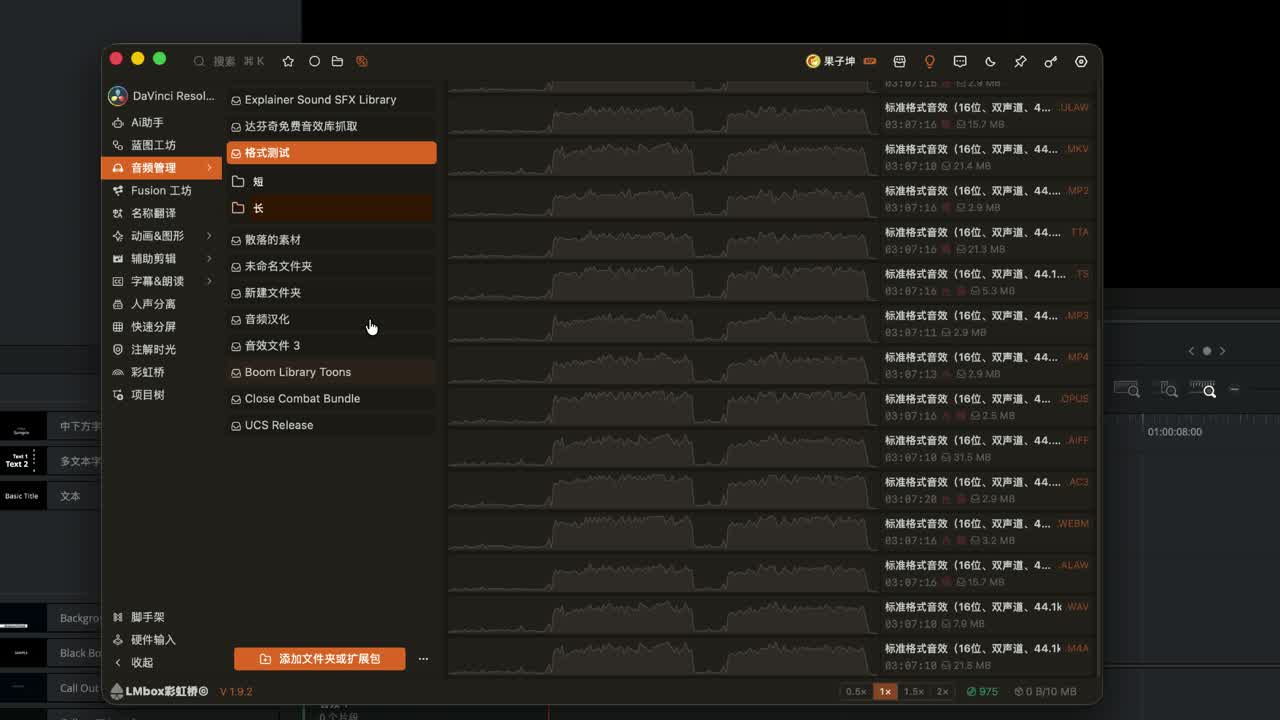
Figure: The drop zone lists the supported extensions. Lossy and lossless formats can both be scanned into the library.
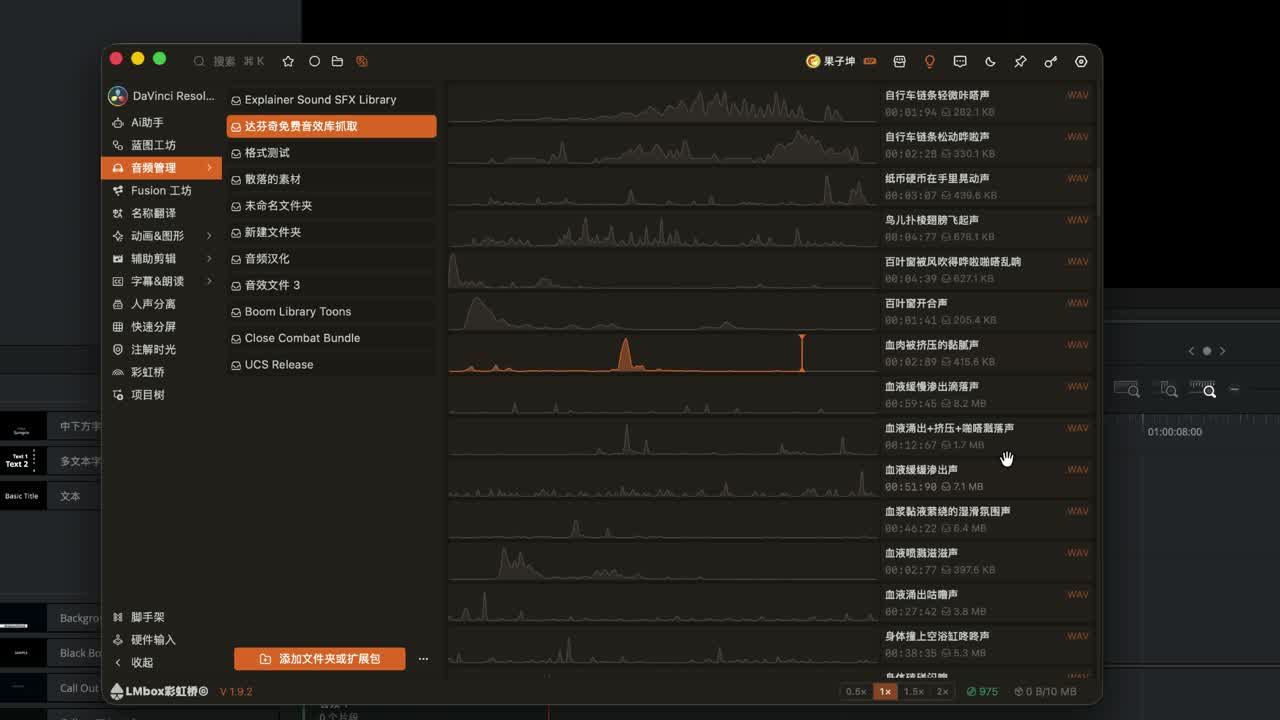
Figure: Hover over the play area to listen, so you rarely need an external player.
2. Wide format support
Common lossy and lossless formats, and audio tracks inside many containers, can be added and scanned. If the editing app cannot read a format, right-click "Transcode and import" (for example, convert to WAV first). A "needs transcoding" mark on the list means preview or import relies on a transcoded copy.
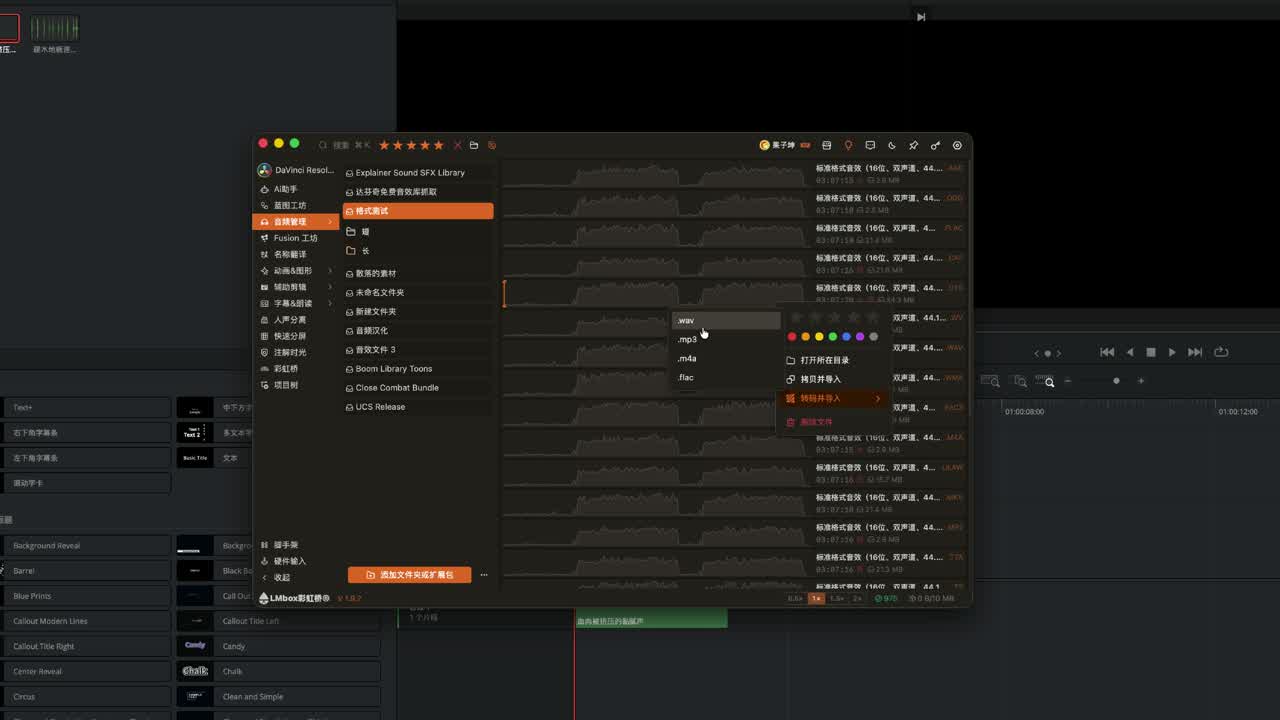
Figure: If a double-click import fails, right-click to transcode first and then bring it into the project.
3. Light editing: range, speed, reverse
Double-click the waveform (not the text area) to open light editing: drag a range, fine-tune with the handles, play with Space. Change the speed to hear different feels. Reverse suits intro and outro textures. When you are happy, import it or drag it out.
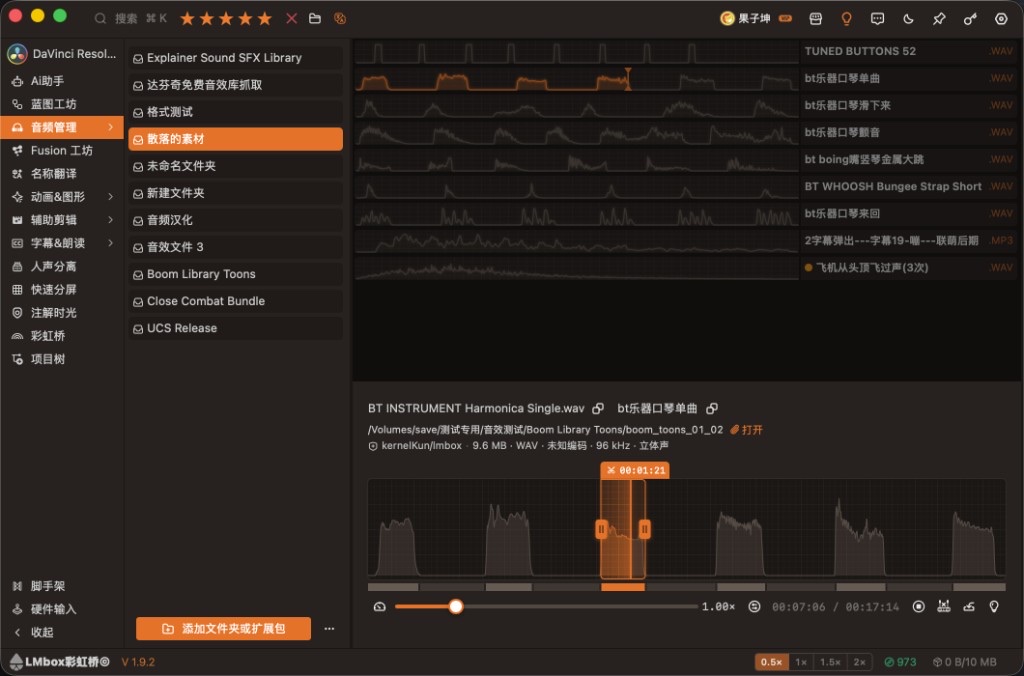
Figure: Double-click the waveform to open the range. Use handles and presets to pick a section.
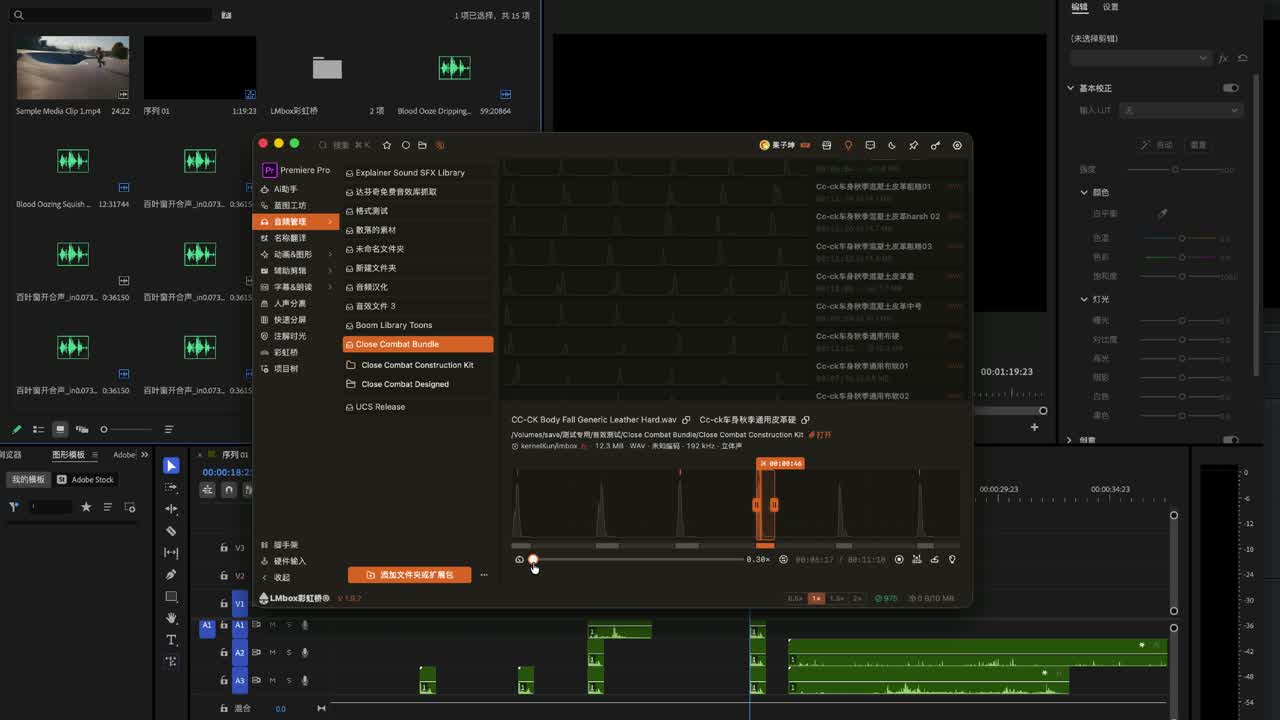
Figure: Try several speed feels on the same sound before you decide to import.
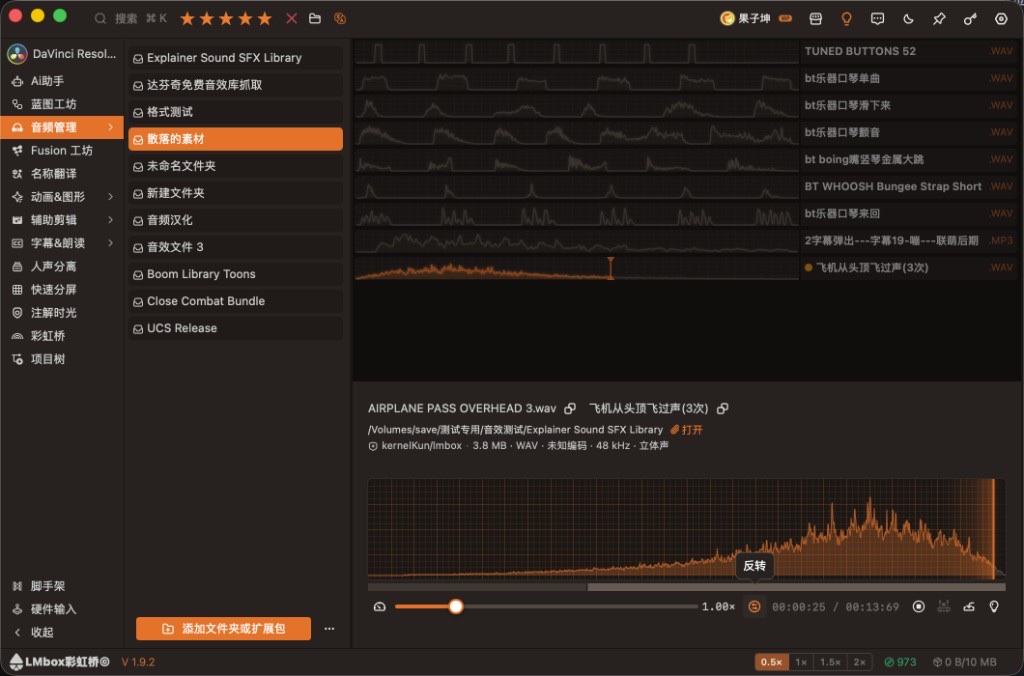
Figure: Reverse is often used for entrance and exit transition textures.
Four ways to import (from fast to precise)
| # | Way | How | Best for |
|---|---|---|---|
| 1 | Double-click the text area | Hover to listen; double-click the name/info area → import to the track of the connected editing app | A whole sound into DaVinci Resolve / Premiere fast |
| 2 | Drag | Drag the grip in the info area to any place on a timeline (including other editing apps) | Any drop point, across apps |
| 3 | Drag out a range | Double-click the waveform → draw a range → drag out with the grip | Only the middle part |
| 4 | Shortcut | When the range is ready, press "Import selected range" from the help (often W by default) | Keeping your hand off the mouse |
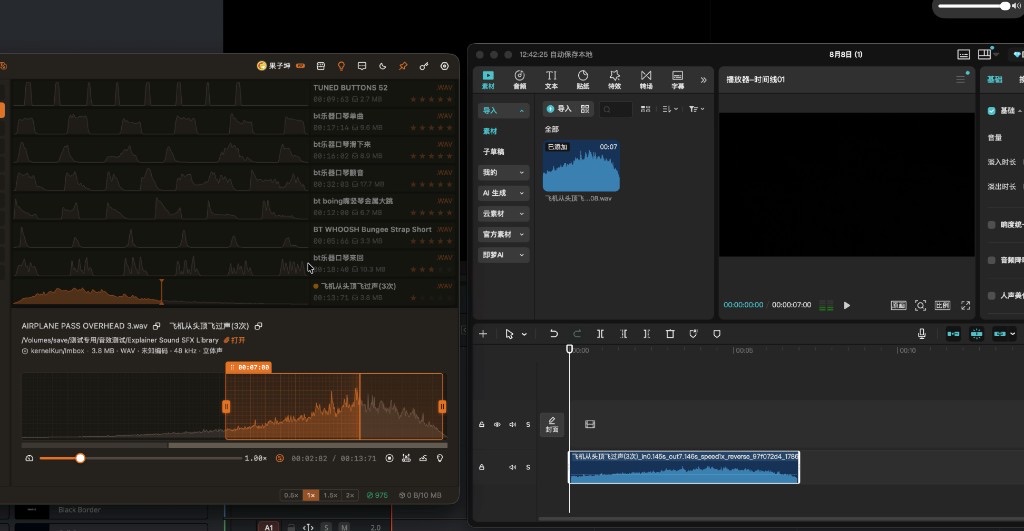
Figure: The grip can drop to any place you want, not only the connected editing app (the demo drags into another editing app).
The light-bulb help lists all the shortcuts, and you can change the keys in Settings.
Clipping hints and waveform settings
If the waveform shows clipping hints (a yellow bar, a red dot, and more obvious in oscilloscope style), the level may be clipping. Check it before you bring it into the project.
In LmBox Bridge Settings › Audio & waveforms you can change the list style (retro recommended, line art, oscilloscope and more), preview quality, build concurrency and cache. Bar styles use more computing power, so a typical computer should stay on the recommended style. An empty file cannot build a waveform. The options are explained in that section of Settings.
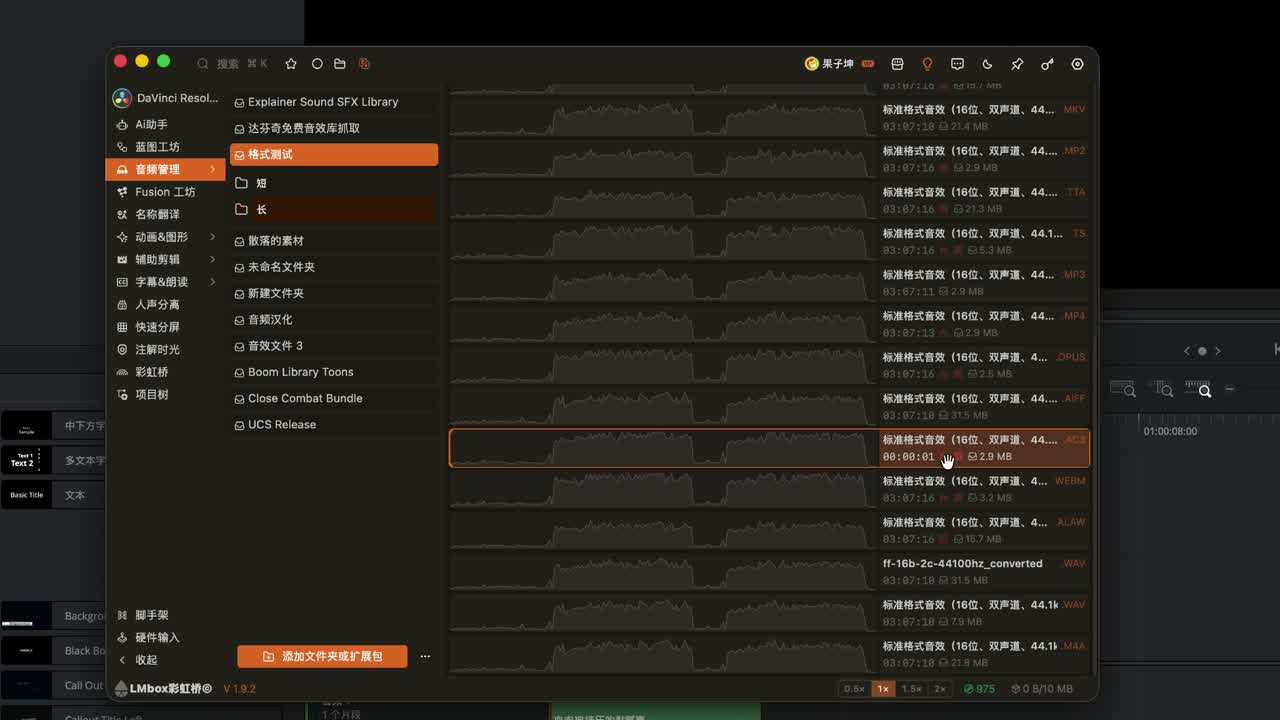
Figure: When a clipping hint shows up, listen to the level once more before it goes on the timeline.
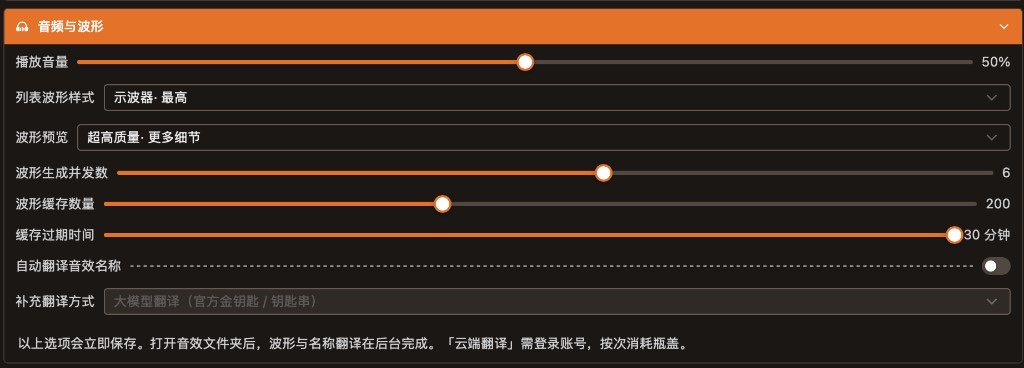
Figure: "Audio & waveforms" in Settings — volume, style, preview quality, concurrency and cache (details in Settings · Audio & waveforms).
Search and favorites
- By name: use the translated name or the original file name. For very deep folders, keep the search depth small.
- By description (experimental): build local search features for the folder first, then type something like "explosion" or "huge explosion" to filter.
- Favorites: right-click to set stars; color labels can filter (like Mac folder labels).
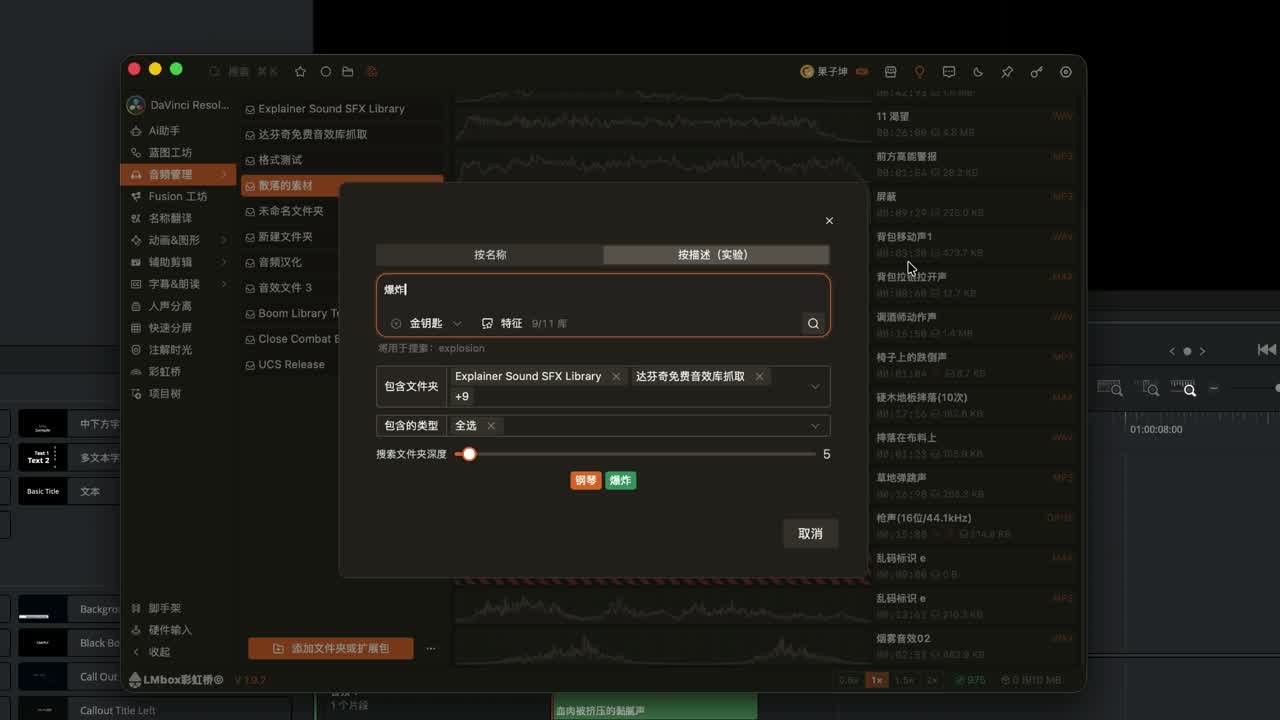
Figure: After the index is built, find sounds with a plain-language description.
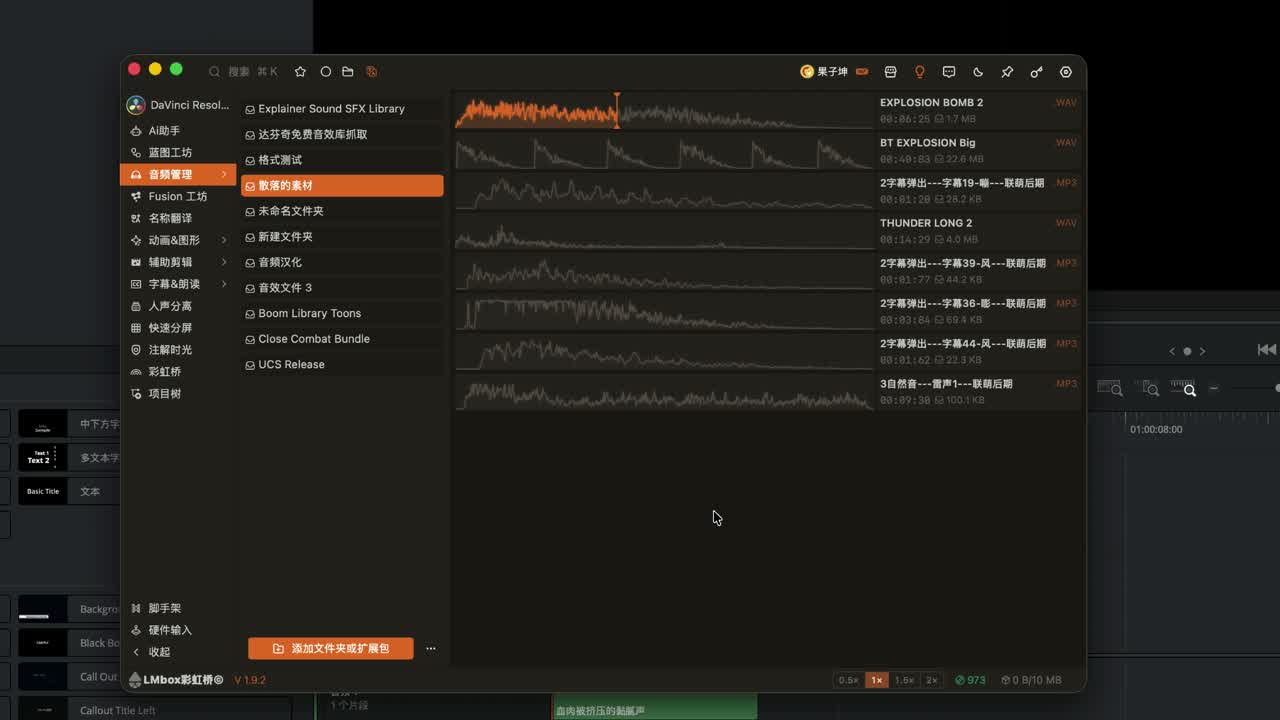
Figure: Stars and color labels make personal filtering easy, with no need for a complex tag system.
How it works (what you can notice)
After you add a library, LmBox Bridge prepares waveforms and optional translated names for each item in the background. Hover uses the list player; double-clicking the waveform opens a separate range editor. Importing into the editing app uses the extension's current target; dragging hands the whole sound or the range to the app at the drop point. Uncommon formats are first turned into a readable copy by the installed transcoding component, then previewed or imported. Search by description relies on local features you built beforehand. It does not generate sound effects online.
FAQ
What is LmBox Bridge Sound library?
A local sound library in the sidebar: waveform preview, hover to listen, light range editing, and import into DaVinci Resolve / Premiere or drag into another app.
How do I import into DaVinci Resolve or Premiere?
Connect the matching extension and pick the right editing app in the sidebar. Double-click the text area to import the whole sound, or draw a range and use the shortcut or drag out. Details are in the main guide.
How is it different from DaVinci Resolve's sound library?
See the table above: LmBox Bridge is a cross-app library with light editing; DaVinci Resolve's sound library is the app's built-in index and Fairlight workflow.
How do I import only the middle part of a sound?
Double-click the waveform → drag a range or the handles → import the selection with the shortcut, or drag it to the timeline with the grip.
How do I search sounds by description?
Run "Build search index" on the folder first, then search by description. If a Chinese description asks for a model or key, follow the on-screen hint.
The editing app does not support the format. Can light editing replace a Fairlight mix?
Right-click Transcode and import, and make sure the external transcoding tools are installed. Light editing only does range, speed and reverse before the timeline. It cannot replace Fairlight or a full mix.